Creating the .NET React template with TypeScript

When creating a .NET project you have the option of using a React template. Using this project template is extremely useful when trying to get a project up and running quickly. Out of the box, this template allows us to run the npm server on build, proxy requests to the backend, and have our frontend hosted on HTTPS (for development) by using the .NET local certificate.
TLDR: Download the template created in this article from: ReactTypeScript.NET
Creating the project
First thing we need to do is create the project. We are still going to use the React template, but we will modify it later to use TypeScript.
Open Visual Studio and create a new project.
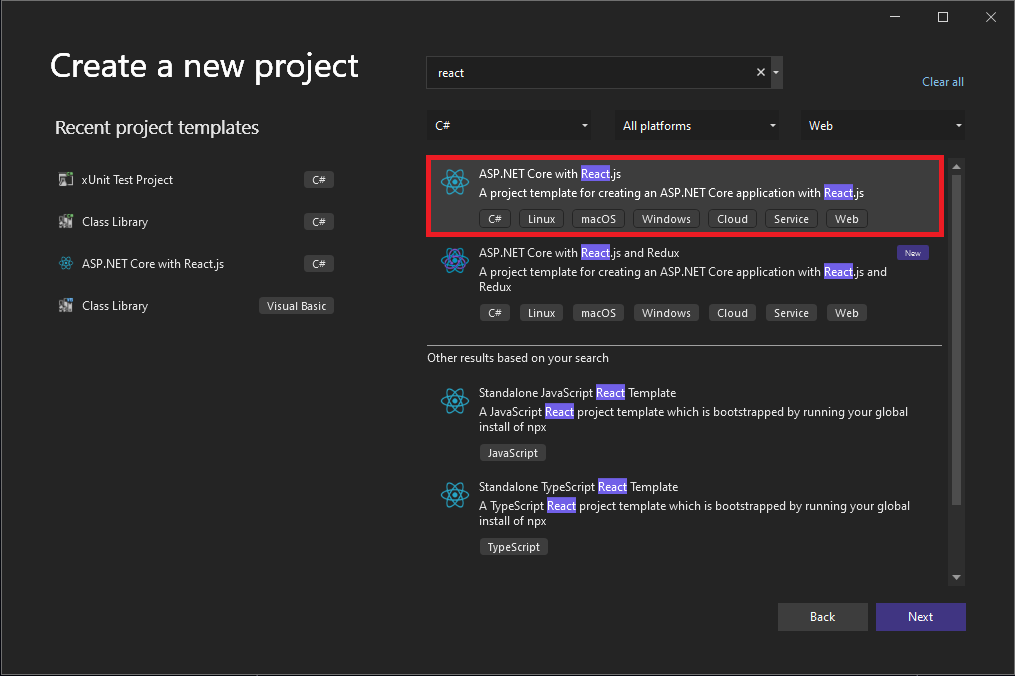
Select the .NET Core with React template. Next, give your project a name and select your framework (I will be using .NET 6).
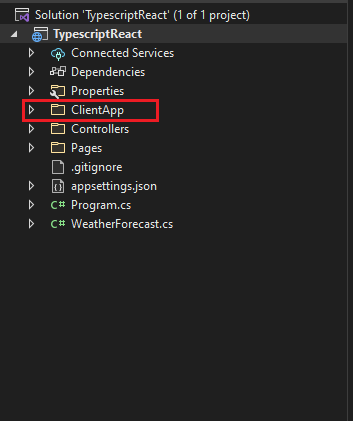
You should now have a .NET project that contains a folder called ClientApp. This is the folder where your React code sits. Since we aren't going to be using the JavaScript code that comes with this template we can go ahead and delete this folder.
Now that the JavaScript code is gone we can create our TypeScript React project. Open up the command line and navigate to the directory of your .NET project (where the ClientApp folder used to be) and run
npx create-react-app client-app --template typescript .
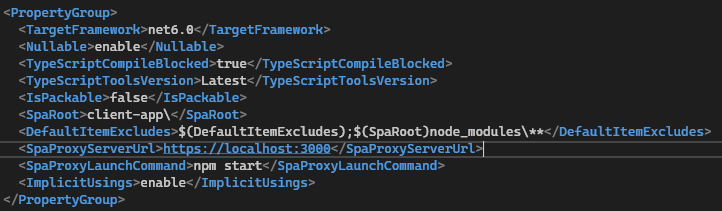
Finally, inside your projects .csproj file update SpaRoot to the folder name of your react-app (I used client-app).
Installing Dependencies
There are a few things we need to make sure everything goes smoothly.
Make sure you have a modern version of node (I'm using 16.13.1 for this article). You can run node -v to check the version you are using.
You will also need ts-node installed, if you don't have it already you can run
npm install ts-node in your react apps root directory or npm install -g ts-node if you would like to install it globally.
Lastly, navigate to the react app you created before and run npm install @types/node --save-dev this will help you avoid any issues with importing modules.
Configuring the proxy
Now that we have the TypeScript React project created inside our .NET project we want to make it easy to proxy requests to the backend. This is optional, just know that if you don't do this you will have to specify where to send requests (https://localhost:44388/api/request for example).
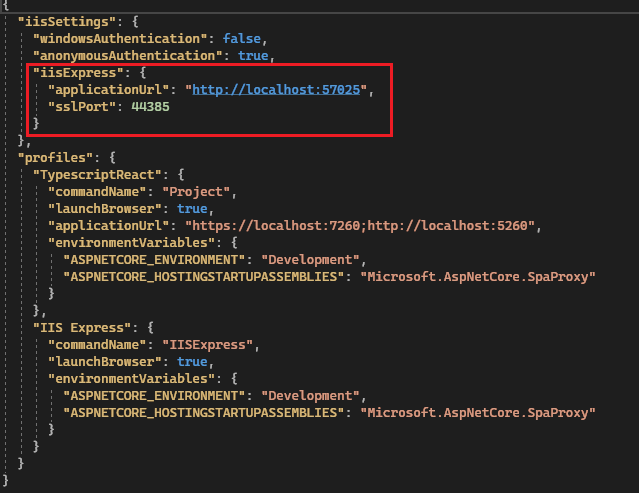
Open up your launchSettings.json file inside the Properties folder and take note of the application URL and SSL port.
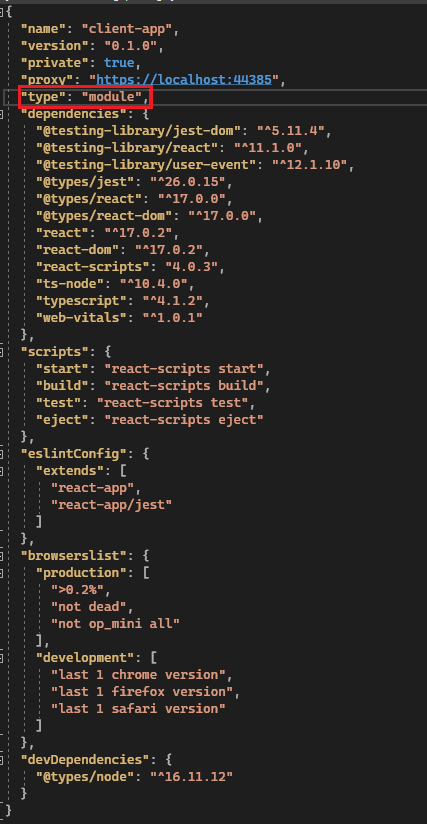
Next, open your package.json file inside the client-app folder you created and set the proxy property to the URL from the launchSettings file. While we haven't set up HTTPS quite yet we will do that later so we should set it to the HTTPS URL.

While we're in the package.json we will also add "type": "module" which you can read more about here.
Setting up HTTPS
There are two main files that the .NET React template uses to configure HTTPS, we are going to create those files manually but in TypeScript rather than JavaScript.
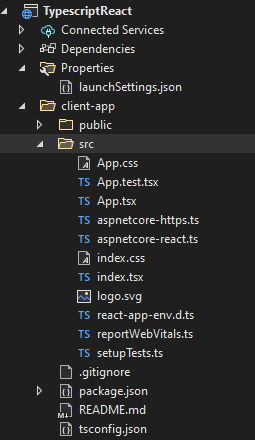
Inside the client-app/src folder create two files called aspnetcore-https.ts and aspnetcore-react.ts. Below is what my folder structure looks like after creating those two files.
Now we actually have to write some code. Open the aspnetcore-https.ts file you just created and add this code (or you can copy it from here).
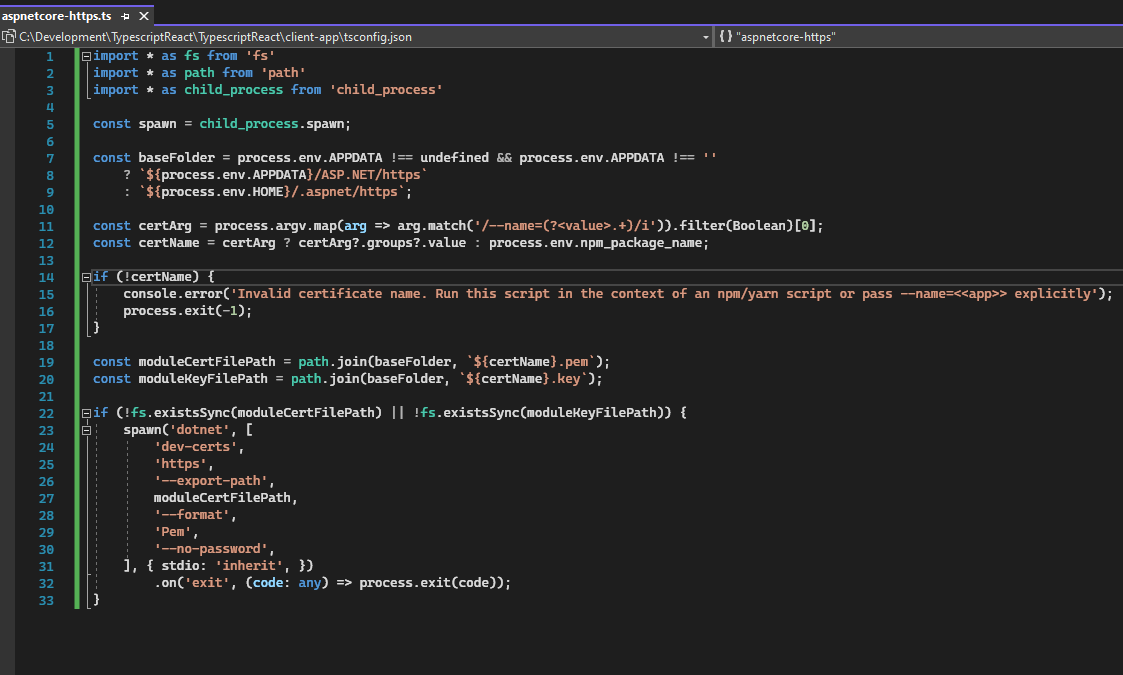
This is going to allow your frontend to use the .NET HTTPS development certificate.
You can now open the aspnetcore-react.ts file and add this code (or copy it from here).
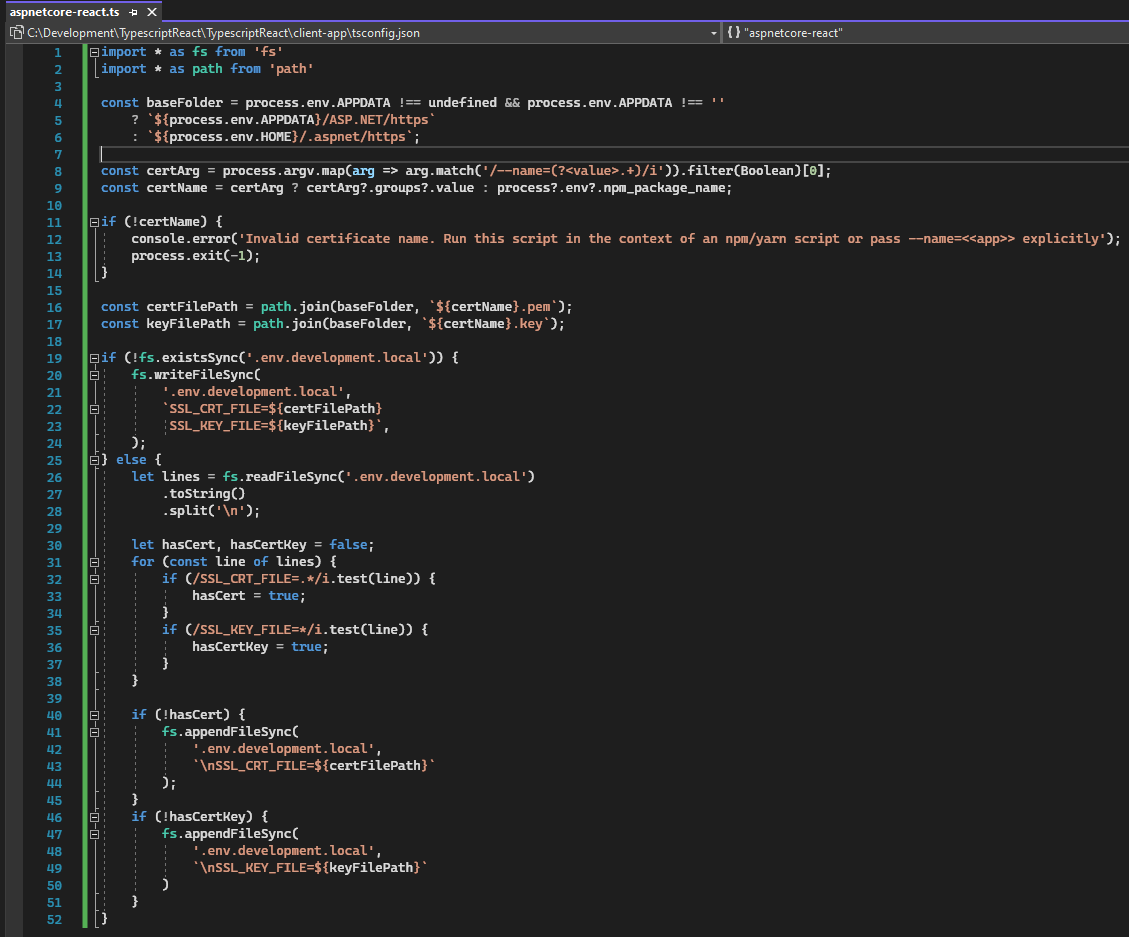
The aspnetcore-react.ts file sets up the .env.development.local file with environment variables to configure HTTPS.
To finish setting up HTTPS locally we need to have these two scripts run on build. This is pretty simple to do by modifying your package.json script section.

You can test that everything is working as expected now by running npm run prestart or by running the whole app with IIS.
Troubleshooting
If your app isn't running properly there are a few key areas to check.
- Verify your node version by running
node -v(I'm using 16.13.1) - Verify ts-node and
@types/nodeare installed - Check that
"target": "ES6"and"module": "ESNext"is set in tsconfig.json - In the package.json file make sure that
"type": "module"is set
Finishing up
At this point, you should have all the features of the .NET React JS template but with TypeScript. Hopefully, one-day Visual Studio will come with an option on top of the React template that lets you select between JavaScript and TypeScript.
You can look at the project created in this article here: ReactTypeScript.NET.

